Tag Archives: bread

Ciabatta Bread

4 Nov

So this post is grossly overdue because all the bread has been consumed. Actually, all the bread was consumed about three hours after it came out of the oven, but I digress.

My parents got me a gorgeous green KitchenAid mixer (!!!!!) as a graduation present in June, but it wasn’t until I moved to Davis that I broke it in. Using this recipe from Raccoon and Lobster (one of my absolute favorite cooking blogs evarr), I endeavored to make ciabatta bread.

For some reason, my dough started climbing as soon as I switched to my dough hook. Within five minutes, it was peeling away from the sides of the bowl and thwapping away. I started studying for a bit, and the mixer would’ve fallen off the counter had my roommate not grabbed it. That’s what I get for being a nerd, I guess.

I let the dough rise over the preheating oven which, in retrospect was probably not the best idea. The yeast went insane and tripled in something like half an hour. Oops.

5 minutes later.

30 minutes later.

Yeah, okay that was insane. Anyway, I also went a  little overboard with dusting the dough/baking pan. I was really afraid of the bread sticking and burning, so I covered the thing in layers and layers of flour. Sadly, I had no cornmeal. I ended up with a lot of burnt flour that could be tapped off when the loaf was cut.

Rather successful for my second foray into bread-baking, I think. Next up…sourdough?

Garlic Bread (No French Bread Necessary!)

29 Jun

Bobby’s off to Serbia for the Summer World University Games (basically the collegiate Olympics), so Christine will be holding down the fort in his absence. I apologize in advance.
DSC_0030

For weeks, I’ve been hearing the siren call of bread-baking. The frothy yeast and rising dough held an allure that I just couldn’t ignore. But little things kept getting in the way. A lack of flour here, a sprinkle of laziness there, and weekends kept passing me by.

Last Thursday, though, I finally popped my bread cherry. Yeast cherry. Rising dough cherry. Whatever. The point is, I baked bread with yeast and the dough rose. (Please bear with me–I seem to be catching a cold.)

Garlicky Goodness Bread
Modified from BitterSweet

Ingredients
1.5 heads garlic (use more or less depending on your desired garlic level)
cooking spray or olive oil
2 tbsp butter
1 cup warm water
1 tbsp granulated sugar
1 packet active dry yeast
1 tsp salt
2 tbsp fresh, chopped parsley
3 – 4 cups whole wheat flour

Preheat your oven to 400 degrees.

Cut the tops off the heads of garlic and peel off the papery outer skin. Spray garlic with cooking spray or drizzle a bit of olive oil on top and wrap everything up in aluminum foil. Stick it in the oven for about 35 minutes, until fragrant. Let cool, then toss into blender with butter. Fail at blending, learn your lesson, purchase a food processor, and blend into a smooth paste. Purchasing a food process is optional. I just kept scraping down the sides and bottom of the blender with a spoon. This took awhile.

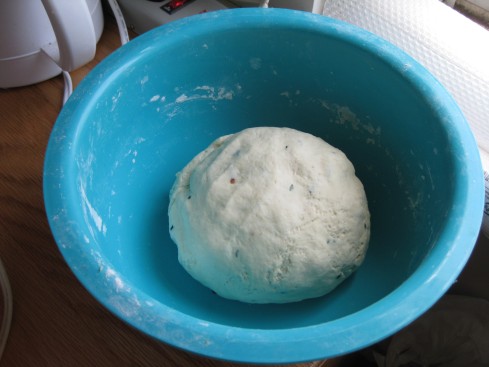
In a large bowl, mix together the sugar and water, and then sprinkle over the yeast. Let it sit for 5 – 10 minutes until frothy. Add in the salt, garlic paste, chopped parsley, and the first 3 cups of flour. I mixed it by hand, but if you have a stand mixer, by all means use the dough hook. I envy you. The dough should be very slightly sticky, but not so wet that bits come off in your hands. If it still seems too wet, add in more flour, 1/4 cup at a time, until you reach the right consistency.
IMG_6975

Turn the dough out onto a well-floured surface, and knead by hand for about 10 minutes, until smooth and elastic. This actually took me 20 minutes because I kept stopping to check on the banana bread simultaneously baking in the oven. Lesson: if you’re tired of kneading, taking breaks is okay. Lightly grease a large bowl, and drop the ball of dough in. Cover with plastic wrap and place somewhere warm for about 1 – 1 1/2 hours until doubled in volume. At this point, I stuck it in the fridge and went out to do something productive (I can’t remember what it was). This is okay, but your dough will be slightly wet on the bottom after you take it out. I had to knead in a little more flour, so I let the dough re-rise for about 30 minutes.

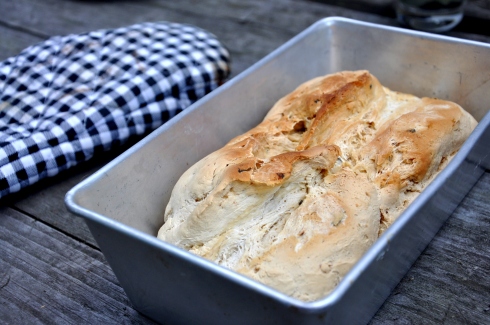
Once risen, turn the dough out onto a well-floured surface again and shape as desired. I made a loaf. Lightly grease an 8 x 4 inch loaf pan, and place your shaped loaf inside. Give the top a quick spritz with cooking spray or a drizzle of olive oil, and let rise for another hour, until it’s peaking out from above the rim by about an inch or so.
CSC_0033

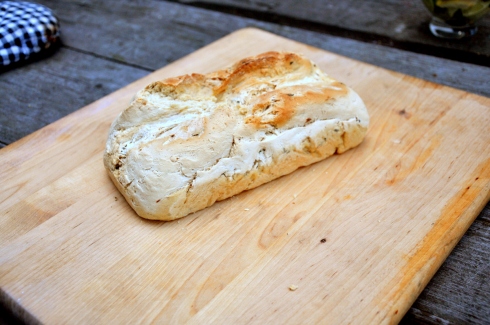
Once it seems to be almost fully risen, preheat your oven to 350 degrees. Bake the bread for about 30 minutes, until golden brown all over.

The original recipe says that you’re supposed to let the bread cool completely before you cut into it, but patience has never been one of my virtues. We tore into the poor loaf.

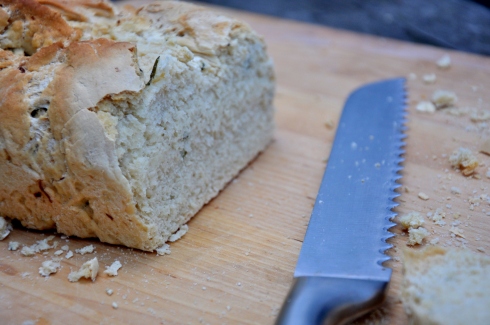
The crumb of this bread was much denser than your average loaf of Wonderbread, and I imagine it’s because I re-kneaded the dough after letting it rise, thereby defeating the purpose of the rising. Next time, I’ll skip doing all the productive stuff and just pay attention to my bread. The garlic taste was fainter than I imagined it would be, perhaps because I lost a lot of paste in the blending step.
DSC_0035

Length of procrastination: About 4 hours 45 minutes, but with a lot of downtime.

Ways to prolong procrastination: Bake the bread in a small toaster oven instead of a conventional oven. It’ll take over 50 minutes, I tell you.

Flat Banana Bread

25 Jun

IMG_6982

I found bananas at Haymarket last weekend for $1/10 bananas. Why any one single person would ever want ten bananas is beyond me, but I saw the slightly bruised beauties and immediately thought BANANA BREAD. After much internal struggle to decide whether chocolate chip banana bread or raisin+walnut banana bread is better, I caved and just made both. The recipe I followed yields enough batter for three mini-loaves, but I guess Bobby’s two full-sized loaf pans were too big for the batter. The result? Two rather flat loaves of banana bread.

IMG_6984

Banana Bread with Chocolate Chips or Raisin and Walnuts
Modified from The Delicious Life

Ingredients
1¾ cups + 2 Tbsp flour (I ran out of AP flour after a cup and made up the rest with self-rising flour)
1½ cups granulated sugar
½ tsp baking powder
1 tsp baking soda
¾ tsp salt
3 small mashed overripe bananas (about 1 cup)
2 large eggs
1/3 cup buttermilk (or, 1/3 cup skim milk + a few squirts of lemon juice)
1/2 cup vegetable oil
splash of vanilla extract
handful of chocolate chips, raisins, and walnuts

Preheat oven to 350 degrees.

Sift together flour, sugar, baking powder, baking soda, and salt into large bowl. In a separate bowl, combine mashed bananas, eggs, buttermilk, oil and vanilla. Mix dry and wet ingredients until a smooth batter forms.

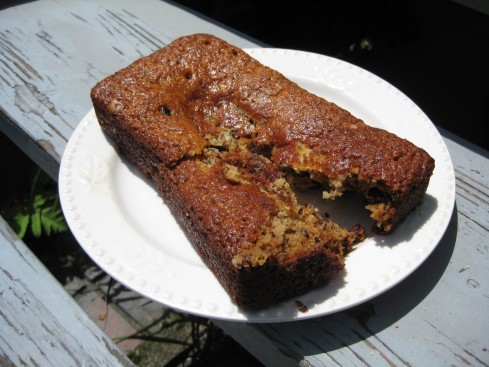
Grease and flour two loaf pans. This is important because if you don’t, your bread won’t want to come out of the pan. Observe:

IMG_6980

Divide batter among loaf pans and stir in desired ingredients (chocolate chips, raisins, walnuts, baby fingers, etc.). Bake for 35 minutes or until deeply golden brown and toothpick inserted into center comes out clean.

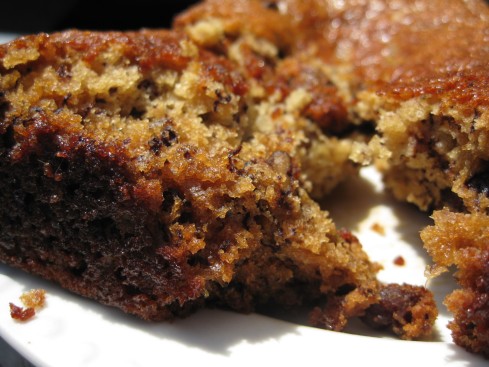
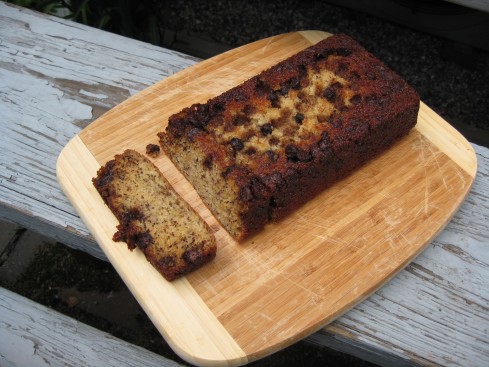
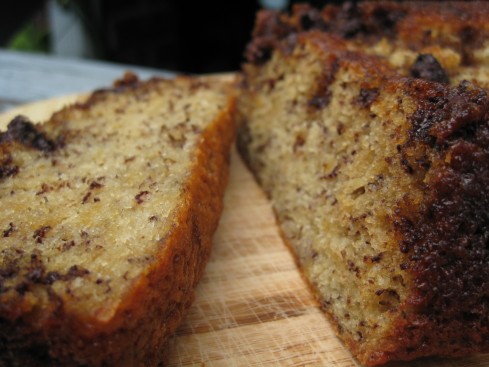
Sadly, all of my chocolate chips sank to the bottom of the batter and I ended up with essentially a layer of chocolate and a layer of bread. Fortunately, the flatness of the bread makes it so you can take a vertical bite and get both flavors in a single mouthful. “But the chocolate chips are all on the top of the bread in the following picture!” you say? That’s because the loaf is upside-down, silly. My bad.

IMG_6988

All in all, this banana bread is pretty tasty. The chocolate chip loaf was a little too sweet, so next time I’ll have to cut back on the sugar. It’s a very moist, cake-y bread, and perhaps a little too chewy for my taste. Perhaps I’ll shorten the baking time  and add a little more baking powder for more leavening power next time.

Length of procrastination: 30 minutes prep + 35 minutes baking

Ways to prolong procrastination: Count the number of B’s used in this blog post. Or, make garlic bread simultaneously. (Guess what the next post will be about!)